Windows Server 2019 kurulumu sonrası sconfig ile hızlı bir şekilde temel yapılandırma ayarlarınızı tamamlayabilirsiniz.
sconfig ile gelen menunun her adımını sizler için açıklayacağım.
cmd yada PowerShell açararak sconfig komutumuzu giriyoruz ve server configuration menusunu görüntülüyoruz.
Microsoft (R) Windows Script Host Version 5.812Copyright (C) Microsoft Corporation. All rights reserved.Inspecting system...=============================================================================== Server Configuration===============================================================================1) Domain/Workgroup: Workgroup: WORKGROUP2) Computer Name: POWERSHELL-OZAN3) Add Local Administrator4) Configure Remote Management Enabled5) Windows Update Settings: DownloadOnly6) Download and Install Updates7) Remote Desktop: Enabled (more secure clients only)8) Network Settings9) Date and Time10) Telemetry settings Unknown11) Windows Activation12) Log Off User13) Restart Server14) Shut Down Server15) Exit to Command Line1 ) Domain/Workgroup: seçeneği ile yapılandırmamıza başlıyoruz. Ortamımızda bir domain var ise domaine eklemek için bu adımı kullanıyoruz. (Not: Server network ayarlarını öncesinde yapmış olmanız ve firewall üzerindne gerekli izinleri vermiş olmanız gereklemektedir.) Domain eklemek için “D” harfini yazıp devam ediyoruz. Yenidnen başlatma gerektirir
Enter number to select an option: 1Change Domain/Workgroup MembershipJoin (D)omain or (W)orkgroup? (Blank=Cancel) dJoin DomainName of domain to join: domain.com2) Computer Name: Bu adımda serverimiz için isim belirliyoruz. (Yeninden başlatma gerektirir)
Enter number to select an option: 2Computer NameEnter new computer name (Blank=Cancel): PowerShell-TestChanging Computer name...3) Add local administrator: Administrator kullanıcısı dışında local bir admin daha oluşturmak isterseniz bu adımdan yeni bir local kullanıcı oluşturabilirsiniz.
Enter number to select an option: 3In a domain environment, specify domain\username.In a workgroup environment, specify username.Enter account to join local Administrators group (Blank=Cancel):4) Configure Remote Managment: Uzaktan yönetim (WinRM gibi) özelleiğini aktif yada deaktif duruma getirmek için bu menuyu kullanıyoruz. 1 ile enable 2 ile disable duruma getirebilirsiniz. (Not: Firewall ayarlarının yapılmış ve network ayarlarının tamamlanmış olması gerekmektedir.)
Enter number to select an option: 4-------------------------------- Configure Remote Management--------------------------------Current Status: Remote Management is enabled1) Enable Remote Management2) Disable Remote Management3) Configure Server Response to Ping4) Return to main menuEnter selection: 1Enabling Remote Management...5)Windows update settings: Windows update tercihimizi seçiyoruz. (A) Automatic sçeneğini seçtiğimizde windows güncellemelerini otomatik olarak indirip kurulumu gerçekleştirecektir. (D) Download only seçeneği güncelleme paketlerini indirecek ancak yükleme için adminden komut bekleyecektir. (M) Manual olan ise indirme ve yükleme işlemini admin tarafından yönetilecek sistemlerde tercih edilmelidir.
Enter number to select an option: 5Windows Update currently set to: DownloadOnlySelect (A)utomatic, (D)ownloadOnly or (M)anual updates: dEnabling DownloadOnly updates...6) Download and Install Updates: Windows güncellemelerini Dowload only yada manual yaptıysanız bu seçenek ile windows güncellemelerini yapabilrisiniz.
Enter number to select an option: 6Komut satırı açılacaktır. Tüm updateleri yüklemek için “A” Önerilen updateleri yüklemek için “R” seçeneğini seçerek devam edebilrisiniz. Yeniden başlatma gerektirebilir.
Microsoft (R) Windows Script Host Version 5.812Copyright (C) Microsoft Corporation. All rights reserved.Search for for (A)ll updates or (R)ecommended updates only? aSearching for all applicable updates...List of applicable items on the machine:1> 2019-01 Cumulative Update for .NET Framework 3.5 and 4.7.2 for Windows Server 2019 for x64 (KB4480056)2> Update for Windows Defender Antivirus antimalware platform - KB4052623 (Version 4.18.1902.2)3> 2019-02 Cumulative Update for Windows Server 2019 (1809) for x64-based Systems (KB4487044)Select an option:(A)ll updates, (N)o updates or (S)elect a single update? aDownloading updates...Installing updates...Listing of updates installed and individual installation results:1> 2019-01 Cumulative Update for .NET Framework 3.5 and 4.7.2 for Windows Server 2019 for x64 (KB4480056): Succeeded2> Update for Windows Defender Antivirus antimalware platform - KB4052623 (Version 4.18.1902.2): Succeeded3> 2019-02 Cumulative Update for Windows Server 2019 (1809) for x64-based Systems (KB4487044): SucceededInstallation Result: SucceededRestart Required: True7) Remote Desktop: Uzak masaüstü bağlantısı için bu özelliği aktif edebilirsiniz.
Enter number to select an option: 7(E)nable or (D)isable Remote Desktop? (Blank=Cancel) e1) Allow only clients running Remote Desktop with Network Level Authentication (more secure)2) Allow clients running any version of Remote Desktop (less secure)Enter selection: 2Enabling Remote Desktop...8) Network settings: IP ve DNS ayarlarını bu adımda gerçekleştiriyoruz.
Enter number to select an option: 8-------------------------------- Network settings--------------------------------Available Network AdaptersIndex# IP address Description 2 178.18.199.237 vmxnet3 Ethernet AdapterSelect Network Adapter Index# (Blank=Cancel): 2-------------------------------- Network Adapter Settings--------------------------------NIC Index 2Description vmxnet3 Ethernet AdapterIP Address 178.18.199.237 fe80::f07c:9e78:a13:47b0Subnet Mask 255.255.255.240DHCP enabled FalseDefault Gateway 178.18.199.225Preferred DNS Server 8.8.8.8Alternate DNS Server 8.8.4.41) Set Network Adapter Address2) Set DNS Servers3) Clear DNS Server Settings4) Return to Main MenuSelect option: 1Select (D)HCP, (S)tatic IP (Blank=Cancel):Select option: 2DNS ServersEnter new preferred DNS server (Blank=Cancel):Select option: 49) Date and time: Tarih ve saat ayarlarımızı bu adımda yapılandırıyoruz. Bu adımda size otomatik olarak GUI de işlem yapacağınız pencere gelmektedir.
Enter number to select an option: 9//Saat ve tarih yapılandırması10) Telementry settings: Microsoft müşteri deneyimi programı için bu özelliği açabilirsiniz. GUI size bu konuda yardımcı olacaktır Evet yada hayır seçeneği ile deneyim programına katılabilir yada katılmayabilirsiniz.
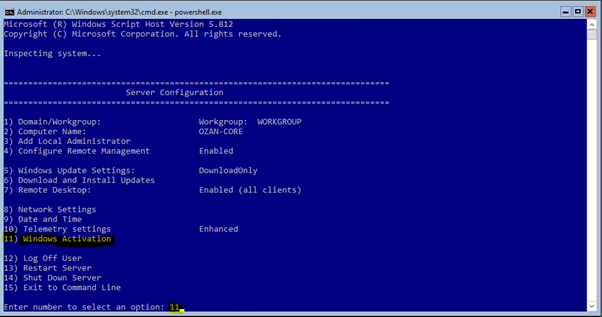
Enter number to select an option: 10// Müşteri deneyimi11) Windows Activation: 1 ile lisans detaylarınızı görüntüleyebilirsiniz. 2 ile windows aktivasyonunu yapabilirsiniz. 3 ile ürün anahtarınızı girebilirsiniz.
Enter number to select an option: 11 -- Windows Activation --1) Display License info2) Activate Windows3) Install Product key4) Return to main menuEnter selection:1Display license info için komut satırı açılacaktır.
Microsoft (R) Windows Script Host Version 5.812Copyright (C) Microsoft Corporation. All rights reserved.Name: Windows(R), ServerStandard editionDescription: Windows(R) Operating System, VOLUME_KMS_WS16 channelPartial Product Key: *****License Status: LicensedKey Management Service is enabled on this machine Current count: 0 Listening on Port: **** DNS publishing enabled KMS priority: NormalKey Management Service cumulative requests received from clients Total requests received: 0 Failed requests received: 0 Requests with License Status Unlicensed: 0 Requests with License Status Licensed: 0 Requests with License Status Initial grace period: 0 Requests with License Status License expired or Hardware out of tolerance: 0 Requests with License Status Non-genuine grace period: 0 Requests with License Status Notification: 0C:\Windows\System32\en-US>Windows aktivasyon için komut satırı açılacaktır.
Enter selection:2Microsoft (R) Windows Script Host Version 5.812
Copyright (C) Microsoft Corporation. All rights reserved.Activating Windows(R), ServerStandard edition (2e7a9ad1-*****-****-b***-17***********) ...Product activated successfully.C:\Windows\System32\en-US>Install Product key için önce GUI de anahtarı gireceğiniz yer açılacaktır. sonra Komut satırı otomatik açılıp işlemi gerçekleştirip kapanacaktır.
Enter selection:3Son olarak 4 ile çıkış yaparak sconfig menusune dönebilirsiniz.
12) log Off User: Oturumu kapatır.
13) Restart Computer: Sistemi yeninden başlatır.
14) Shut Down Server: sistemi kapatır.
15) Exit to Commonad Line: Komut satırına geri döner.
https://social.technet.microsoft.com/wiki/contents/articles/52637.windows-server-2019-sconfig-ile-yaplandrmas-tr-tr.aspx

